Hey all!
As promised - below is the mushroom mod that I made based from the Hedge Witch Hat by Morale Fiber.
This pattern is free as the hedge witch hat hat pattern is also free.
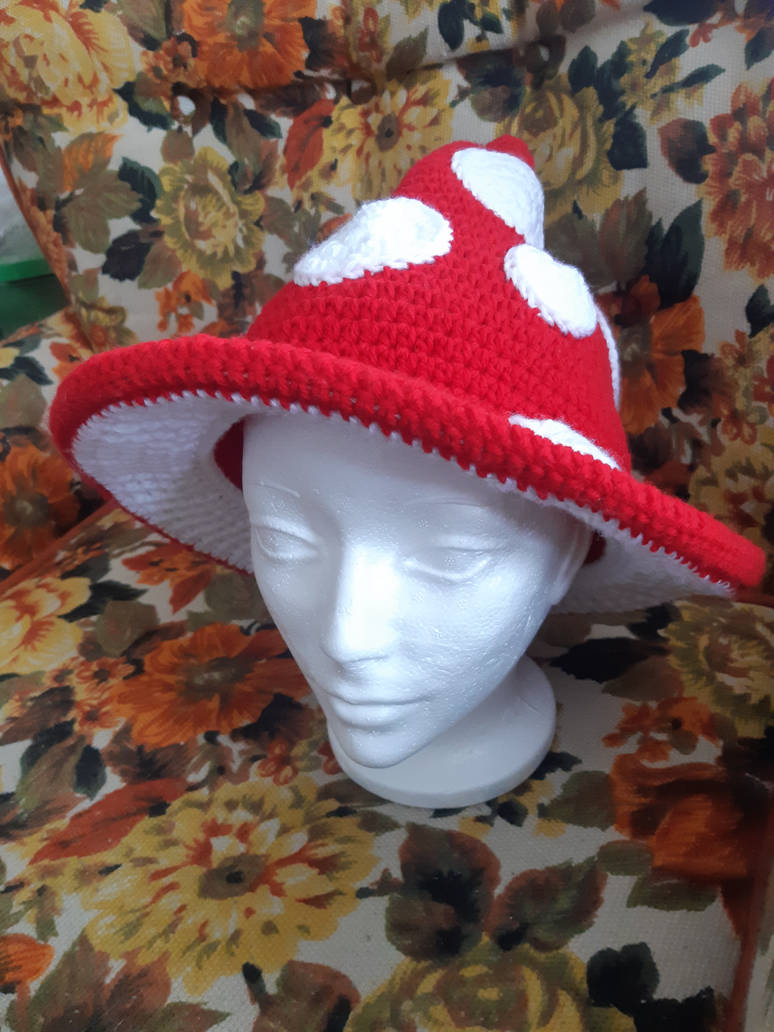
First and foremost - this mod is designed based on the exact design of the Hedge Witch Hat by Morale Fiber.
A couple of important things when doing this mod:
1. You HAVE to use either the 'switchback' method as described in the pattern by Morale Fiber or you can use a different method like the one found here on Nicki's Homemade Crafts on Youtube to keep the seam straight. It doesn't really matter what method you use - what matters is that you keep the seam straight especially in the brim.
2. I used a 1/16 gauge wire rope in the brim fastened with hockey tape. This is not necessary to do the mushroom mod or for the hat in general - it's something I do with the overwhelming majority of my hats. You are welcome to use millinery wire with a fastener or any wire you want with floral tape or cloth wiring harness tape. Whatever works for you.
3. On the last round of the hat I use a single crochet instead of a half double crochet followed by a crab stitch for the brim. You do not have to do this - you can keep the half double crochet but you have to use a front loop only stitch on this last round in order to achieve the loops to crochet into with the frill yarn.
4. I do alternating increase stitches in the brim to keep it rounder to work nicer with the frills. For example, rounds that are even stitches - I will crochet half the total amount to start, increase, then crochet the total amount of stitches between the increase, (6 Hdc, increase, 12 Hdc - until last 7 stitches - then increase, 6 Hdc, join). On the odd number rows I will increase at the end of the total stitches (13 Hdc, increase).
5. Like the pattern - the Ch 1 in the beginning of each row does not count as a stitch. When you join to finish the row - connect it into the Hdc stitch, not the Ch 1.
6. If you are putting in wire and there is a bit of a space between where you are joining your rounds - feel free to put one single double crochet into the base of the stitch you're going to join into however do it through the whole stitch and not just the front loop to keep you from getting confused on whether or not it should be crocheted into for the frills.
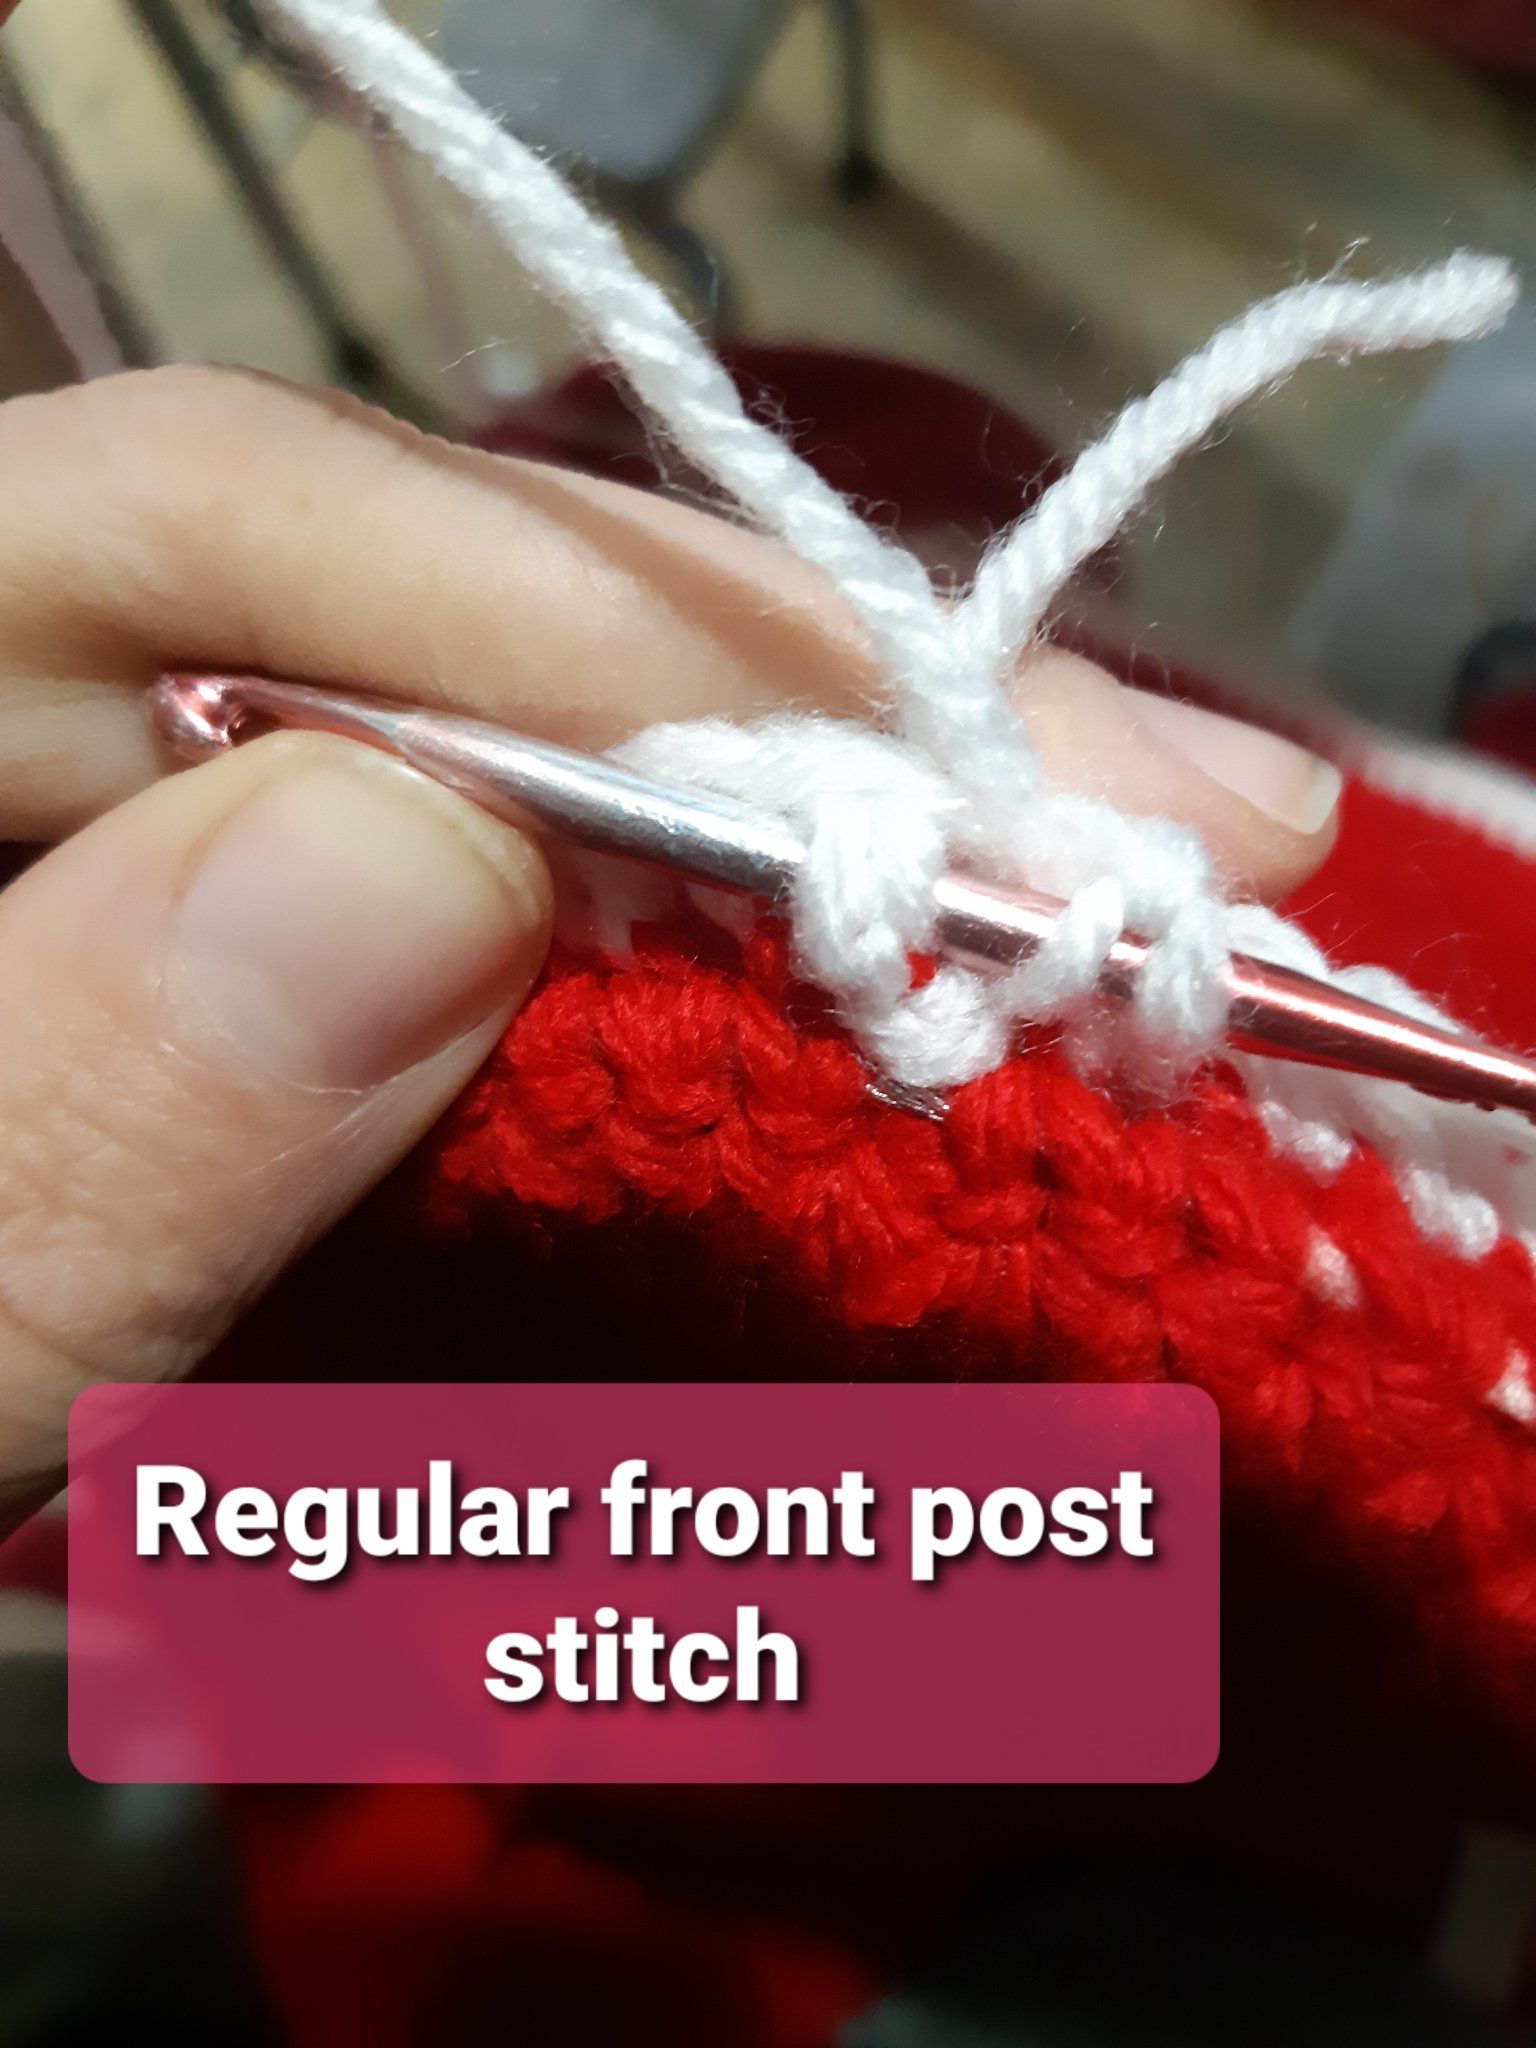
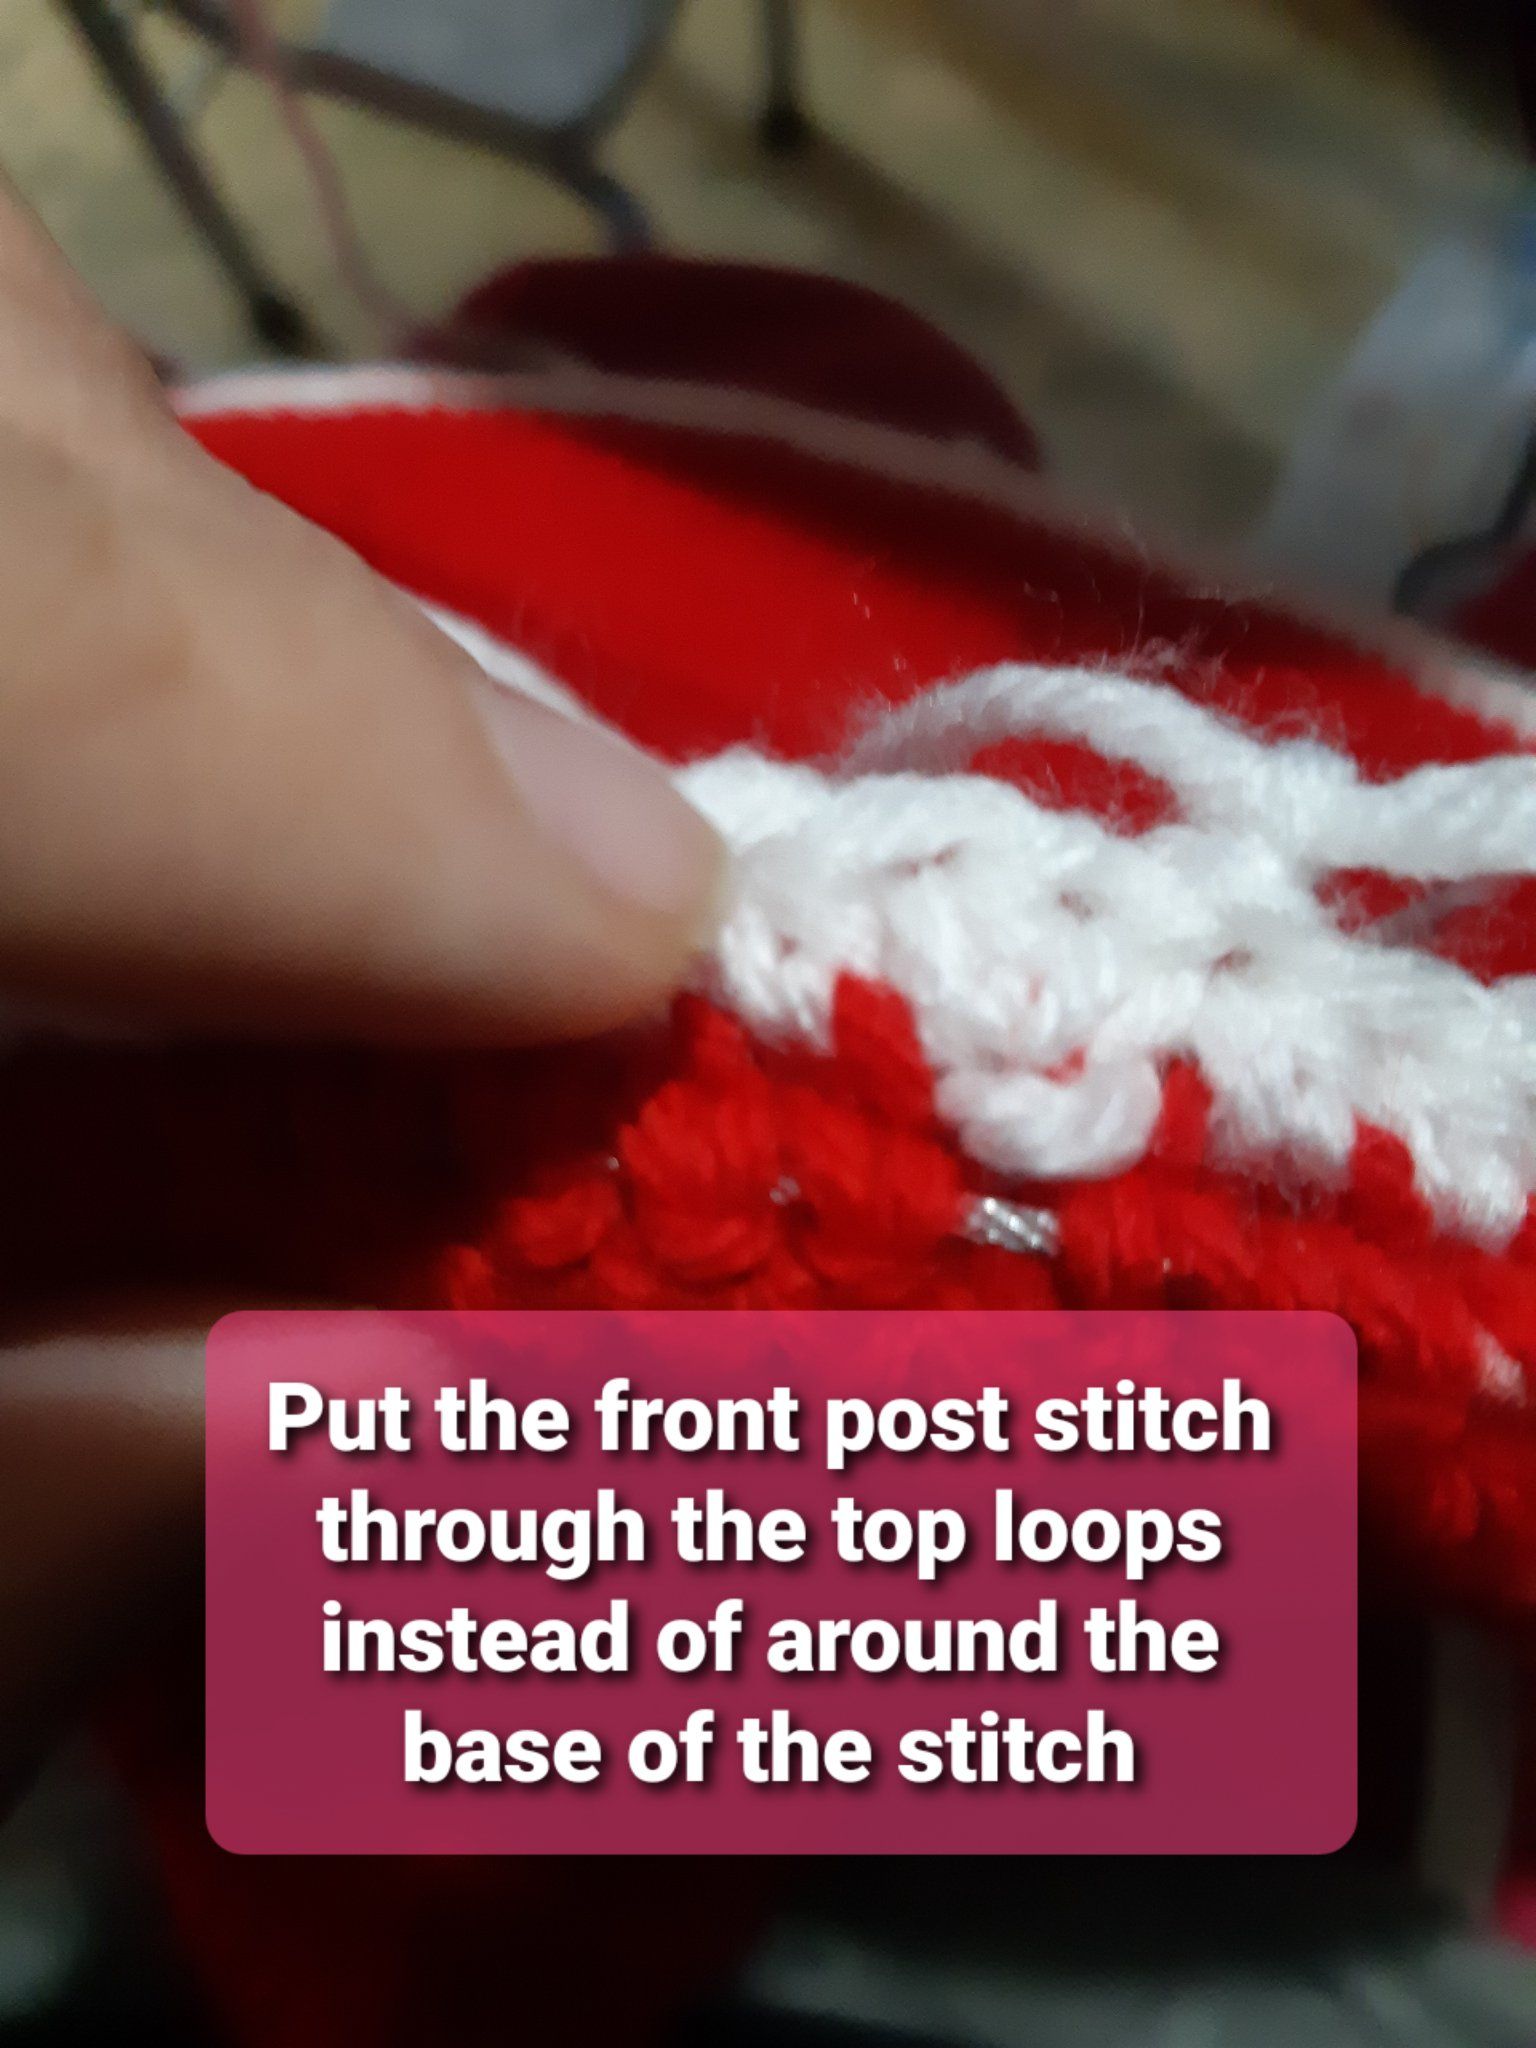
6. When doing the front post/back post - I use a shallow front post/back post stitch - meaning I don't put the hook around the base of the stitch like a normal post stitch. I only put the hook in the top half of the stitch where you usually put the stitches.
See the pictures here for reference:

How to modify the hat for the frills:
Round 29: Do front loop only on this round.
Continue as normal.
Round 35: Do front loop only on this round.
It will look like this: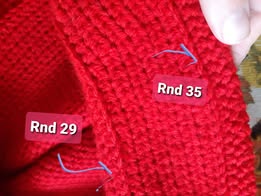
After you have completed the entire hat and have fastened off with the color you want for your hat you will start with the second color.
Quick Terminology Guide:
Sl St: Slip Stitch
Ch: Chain
Sc: Single Crochet
Hdc: Half Double Crochet
Dec: Decrease
Inc: Increase
Sfp: Shallow Front Post
Sbp: Shallow Back Post
Frills:
Round 1: Start by connecting the yarn to the first stitch of round 35 working inward towards the middle of the hat. Ch 1. Hdc into the same stitch as the Ch 1. Hdc in each stitch in the round. Sl St to Join. (144)
Round 2-4: Ch 1. Sfp into the same Hdc stitch below. Spb into the next stitch. Continue until last stitch. Sl St to Join. (it will always end on a Sbp stitch) (144)
This next round is tricky. You will continue to do shallow front post stitches and shallow back post stitches while also decreasing the stitches. Each decrease block will result in 5 stitches total once completed.
Round 5: Ch 1. Sfp into the same Sfp below. Dec next stitch. (One Sbp, one Sfp in the dec). Sbp in next stitch. Dec next 2 stitches. (One sfp, one sbp in the dec). Sl St to Join. (90)
It will look something like this: (R is a regular shallow post stitch, dec is a decrease with shallow post stitches)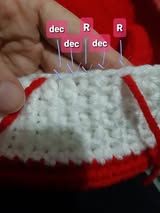
Round 6: Ch 1. Sc into same stitch. Sc into each stitch around. Sl St to Join. (90)
If you managed to keep everything straight - the frills seam should line up with the hat's seam where the back loops will be crocheted into. If not - don't fret. Line up the frills where the loops are so that it's straight and crochet into the loops. You will have 90 stitches regardless so it doesn't really matter where you start - just don't pull it over to line it up otherwise the frills will be offset, pulling and crooked.
Round 7: Ch 1. Sl St into the back loop of round 29. Continue until last stitch. Sl St to Join. Fasten off. (90)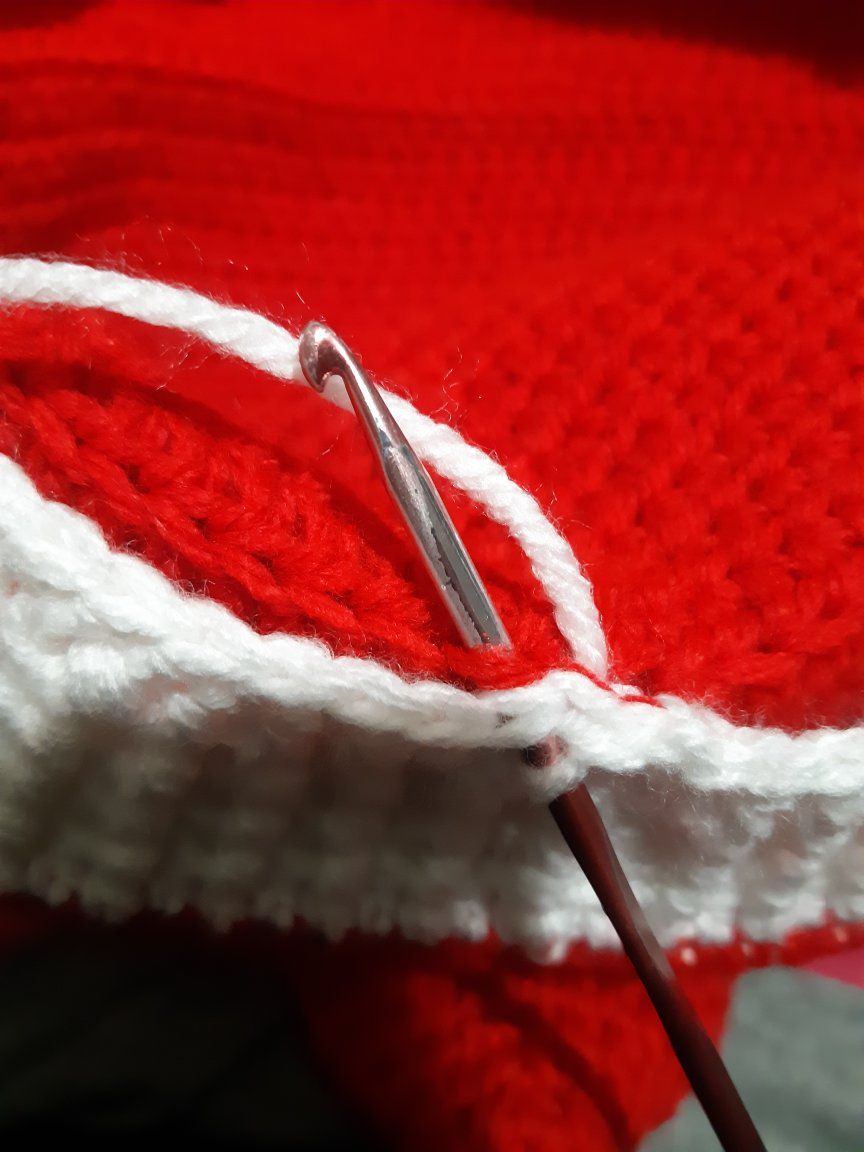
It will look something like this: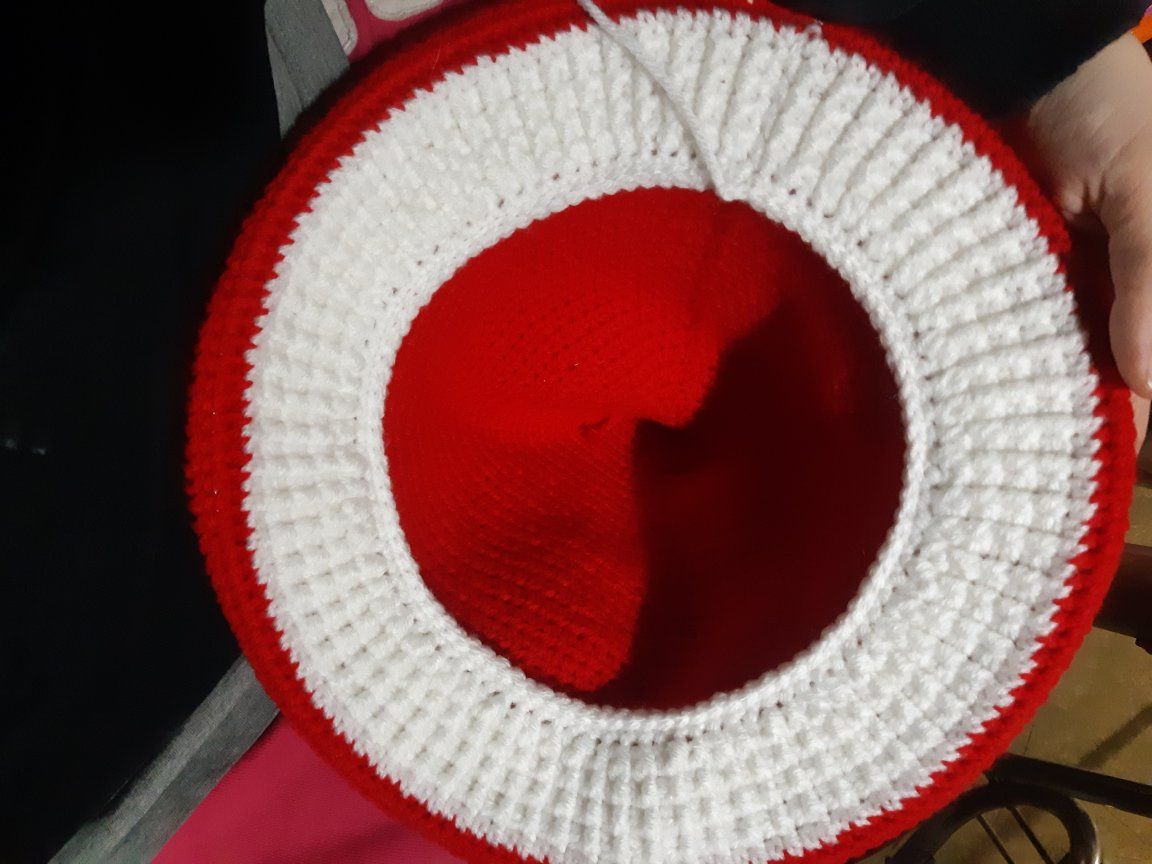
Now all you have to do is make and sew on spots.
You can make various sizes and sew on as many as you want.
A quick pattern for spots is here:
In a magic circle Hdc 10.
Round 1: Ch 1. 2 Hdc in same stitch. Hdc Inc in each stitch. Sl St to Join. (20) Stop here and fasten off if you want small spots.
Round 2: Ch 1. Hdc in same stitch. 2 Hdc in next stitch. Repeat. Sl St to Join. (30) Stop here and fasten off if you want medium spots.
Round 3: Ch 1. Hdc in same stitch. Hdc in next stitch. 2 Hdc in next stitch. Hdc in next 2 stitches. Repeat. Sl St to join. (40). Stop here and fasten off if you want large spots.
And that's all!
If you have any questions about the mod for this hat - feel free to reach out to me via tik tok, facebook, instagram, deviant art, tumblr or you can email.
I'd be happy to help you!